How to Use Threaded Rod for DIY Projects and Repairs?

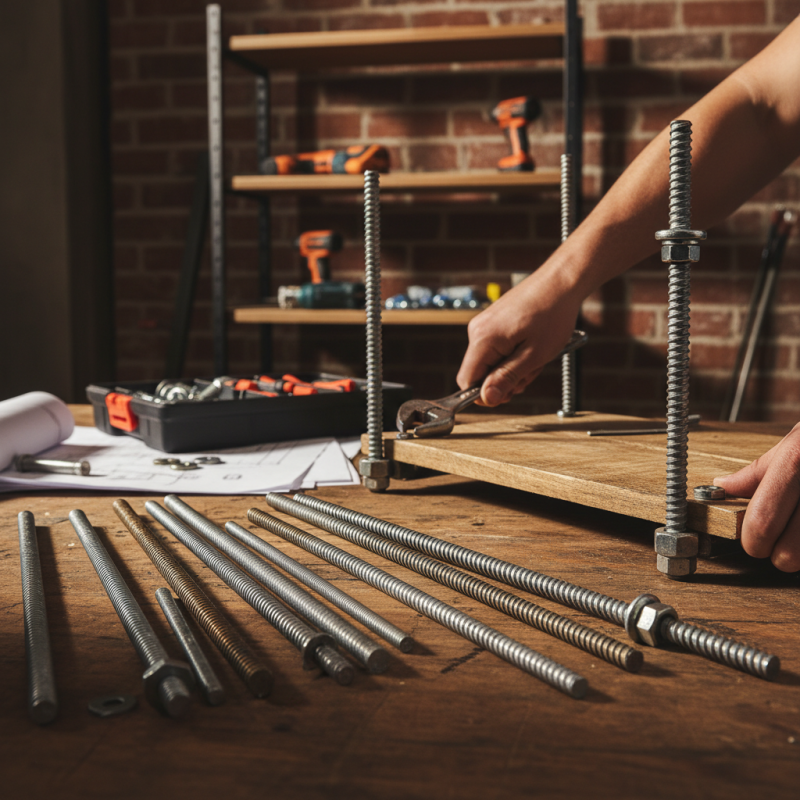
Threaded rods are essential components in various DIY projects and repairs, offering tremendous versatility. According to a report by the Fastener Industry Institute, the use of threaded rods has increased by over 25% in residential construction projects in the last two years. These rods provide structural support and can be easily adapted for different applications.

Expert John H. Miller, a leading figure in the fastening industry, emphasizes, "Threaded rods can transform a basic project into something robust and reliable." This versatility makes them an indispensable tool for both amateurs and professionals. Projects range from creating shelving units to securing machinery in place. Each usage highlights the practicality of threaded rods, yet many underestimate their potential.

While they are simple to use, improper installation can lead to failures. Users often overlook the importance of proper sizing and materials. Taking time to consider these factors can ensure successful outcomes. Threaded rods are not just mechanical components; they represent the bridge between creativity and structural integrity.

How to Use Threaded Rod for DIY Projects and Repairs?

Selecting the Right Type of Threaded Rod for Your Project

How to Use Threaded Rod for DIY Projects and Repairs?

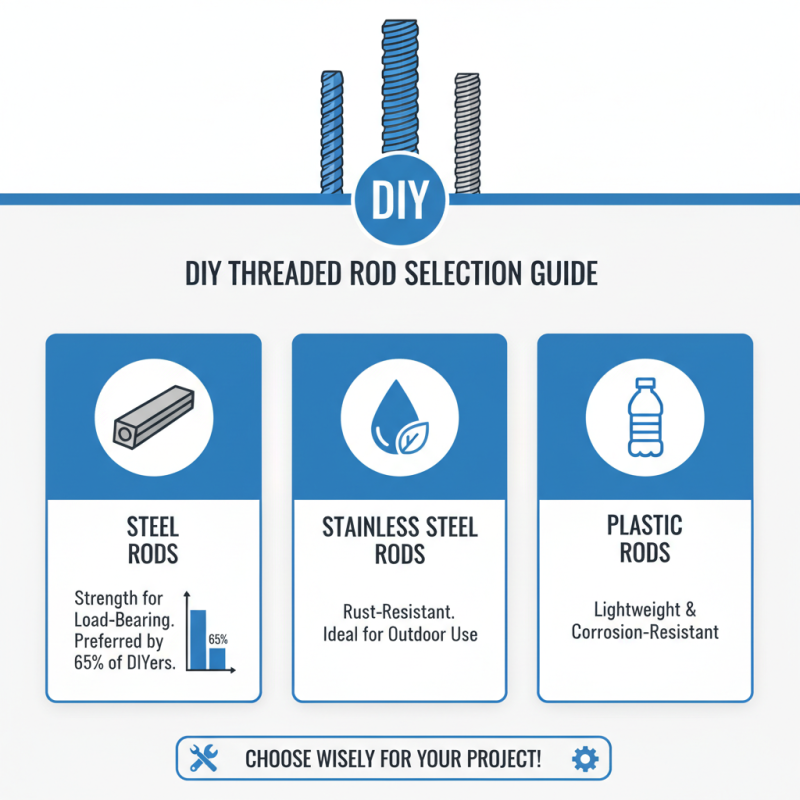
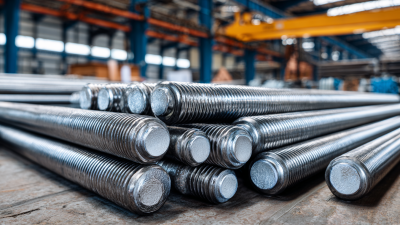
When selecting the right type of threaded rod for your DIY projects, it's important to consider material and size carefully. Steel, stainless steel, and plastic are common choices. Each material has unique properties. For instance, stainless steel resists rust, making it ideal for outdoor use. In contrast, plastic threaded rods are lightweight and corrosion-resistant. According to industry data, 65% of DIY enthusiasts prefer steel rods for their strength, especially in load-bearing applications.

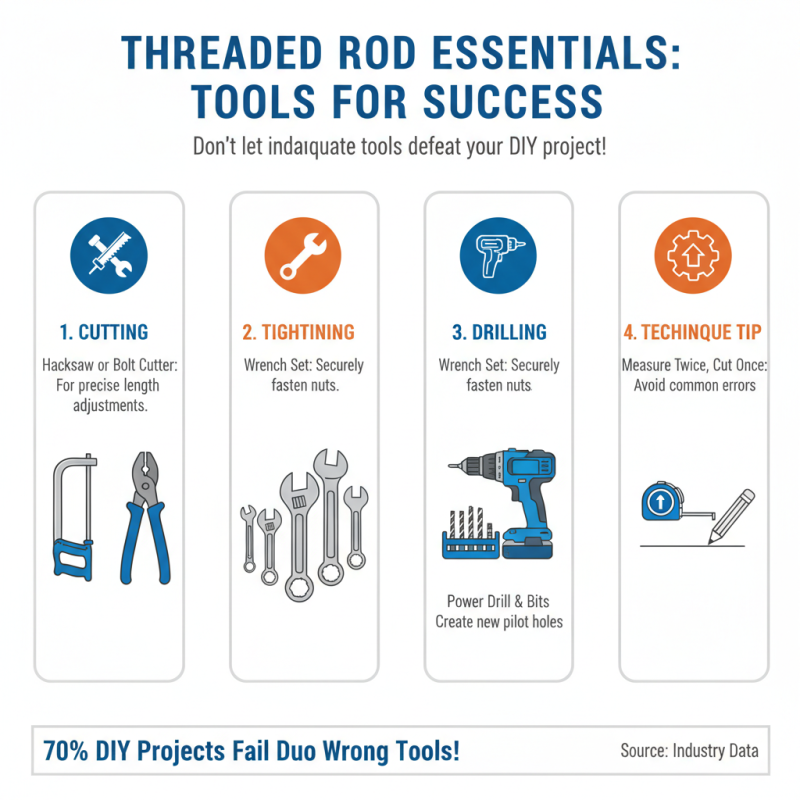
Size matters too. Threaded rods come in various diameters and lengths. For heavy applications, a thicker rod is essential. A report from the National Association of Home Builders indicates that 70% of professionals recommend using 3/8 inch or 1/2 inch diameter rods for substantial projects. However, it’s easy to underestimate the strength needed. Choosing an undersized rod can lead to structural failures. Many novice DIYers fail to account for stress distribution, which often results in cracking or bending.

Also consider the thread pitch. A coarse pitch can provide quicker assembly and is more forgiving for alignment issues. But, it can lock up under heavy loads. Whereas, a fine pitch offers greater adjustment options but requires more precision. Many DIYers overlook the importance of matching the thread type to the project requirements. This can lead to frustrating setbacks that may derail the overall project timeline. Effective planning can save time in the long run.

Essential Tools Needed for Working with Threaded Rod

How to Use Threaded Rod for DIY Projects and Repairs?

When working with threaded rod, having the right tools is critical for success. According to industry data, over 70% of DIY projects fail due to inadequate tools or improper techniques. Basic tools include a hacksaw or bolt cutter, which are essential for cutting threaded rods to size. You will also need a wrench for tightening nuts. A drill with appropriate bits is vital if you're creating new holes.

Measuring tools are equally important. A tape measure ensures precise cuts. Misalignments can lead to structural weakness. A level makes sure that everything aligns correctly. Interestingly, about 40% of projects face alignment issues, resulting in rework.

Don't forget safety gear. Safety glasses protect your eyes from metal shards while cutting. Gloves provide a better grip and prevent injuries. Remember, even minor mistakes can lead to significant problems in your project. Paying attention to detail can improve your results dramatically.

Step-by-Step Guide to Cutting and Shaping Threaded Rod

Cutting and shaping threaded rod can be easy with the right approach. Start by measuring the length you need for your project. Mark it clearly with a permanent marker. When cutting, use a hacksaw or a metal cutter. It’s important to maintain a steady hand for a clean cut. If you notice any rough edges, use a file to smooth them out. This ensures your threaded rod fits perfectly into your project.

While working, consider wearing safety goggles. Metal shavings can fly around unexpectedly. If you’re new to using threaded rods, practice on scrap pieces first. This helps you understand the cutting technique without wasting materials. Watch out for over-tightening when securing the rod. It can strip the threads or break the rod altogether.

Don't hesitate to experiment with shaping the rod. You can bend it slightly to fit different spaces. Using a pipe bender is an option for precise angles. However, it requires some skill. If it doesn’t come out right, you can always try again. Embrace the learning curve. Each attempt could lead to a better outcome. A little patience can transform your DIY skills.

Connecting and Securing Components with Threaded Rod

Connecting and securing components with threaded rod is a practical solution for various DIY projects. This versatile hardware can serve multiple functions. It can join two materials, create tension, or even act as a support. You can use it for furniture, shelving, or even in vehicle repairs. The threaded rod's design allows you to tighten nuts on either end for a secure fit.

When working on projects, make sure to measure the lengths accurately. Cut the rod to the desired size with a saw designed for metal. Since mistakes can happen, prepare for some trial and error. You might find that the length isn’t right the first time. Adjust accordingly. Use washers to distribute load and avoid damage to materials. Adjusting connections can be tricky, so be patient as you experiment with alignment.

For added strength, consider using epoxy or glue in conjunction with the threaded rod. These materials can enhance the durability of your projects. However, be mindful of excess glue, which can create messy surfaces. Allow proper curing time for any adhesives used. Balancing strength and aesthetics can sometimes be challenging, but the result can be quite satisfying. Remember to inspect your connections regularly, as they can loosen over time.

Usage of Threaded Rod in DIY Projects

Common DIY Projects Utilizing Threaded Rod

Threaded rods are versatile tools in DIY projects. Many enthusiasts use them for creating strong connections in structures. From furniture to garden trellises, the applications are endless. Imagine building a sturdy shelf using threaded rods to support the weight efficiently. This method not only boosts stability but adds an industrial look to your space.

Another common use involves making hangers or brackets. For instance, in a workshop, threaded rods can help in organizing tools. You can create a customized pegboard by attaching rods directly to the wall. This system allows easy access while keeping the area tidy. However, it requires precise measurements. Getting the length wrong can lead to frustrations and wasted materials.

Some people might overlook using threaded rods in smaller crafts. Consider making curtain tiebacks. They can be graceful yet strong. Using rods for this purpose can enhance the aesthetic appeal of your window treatments. Failing to secure the rods properly can result in droopy curtains. This challenge encourages careful planning and execution during the project.

Have Questions?

Talk to a product specialist today: 1-800-308-6788

Snake Tray Catalog

snake tray® CATALOG

the new catalog is here. AVAILABLE IN PRINT AND ONLINE.

DOWNLOAD A PDF REQUEST A PRINTED COPY
CALL US TODAY