How to Choose the Best Cable Basket for Your Needs
Choosing the right cable basket involves more than comparing prices and product photos. The basket must support cables safely, fit the available space, and allow easy maintenance. A practical decision starts with the installation environment, not the brand name.
In a busy data room, cable baskets may carry power cables, network lines, or control wiring. Each application creates different demands. Check the expected cable weight, basket width, wire diameter, corrosion exposure, and mounting method. A narrow tray can look tidy, yet it may restrict airflow and complicate future upgrades. Measure twice.
Material selection also matters. Galvanized steel suits many indoor installations, while stainless steel may perform better in damp or corrosive areas. Coating quality, edge finishing, and load ratings deserve close attention. Sharp edges can damage insulation during pulling or rearrangement. That detail is easy to miss.
A reliable choice should follow manufacturer specifications and applicable electrical installation standards. Speak with a qualified installer when routing passes above equipment or through demanding environments. Real site conditions often differ from drawings. There is no perfect choice.
I have seen projects select a lightweight cable basket to reduce costs, only to discover sagging sections after installation. That mistake affects appearance, safety, and maintenance time. Stronger supports might have prevented it. Still, oversized systems can waste space and budget. The best cable basket balances capacity, durability, accessibility, and future expansion. Review the decision before ordering, especially when cable growth remains uncertain.
Understanding Cable Basket Types and Their Applications
How to Choose the Best Cable Basket for Your Needs
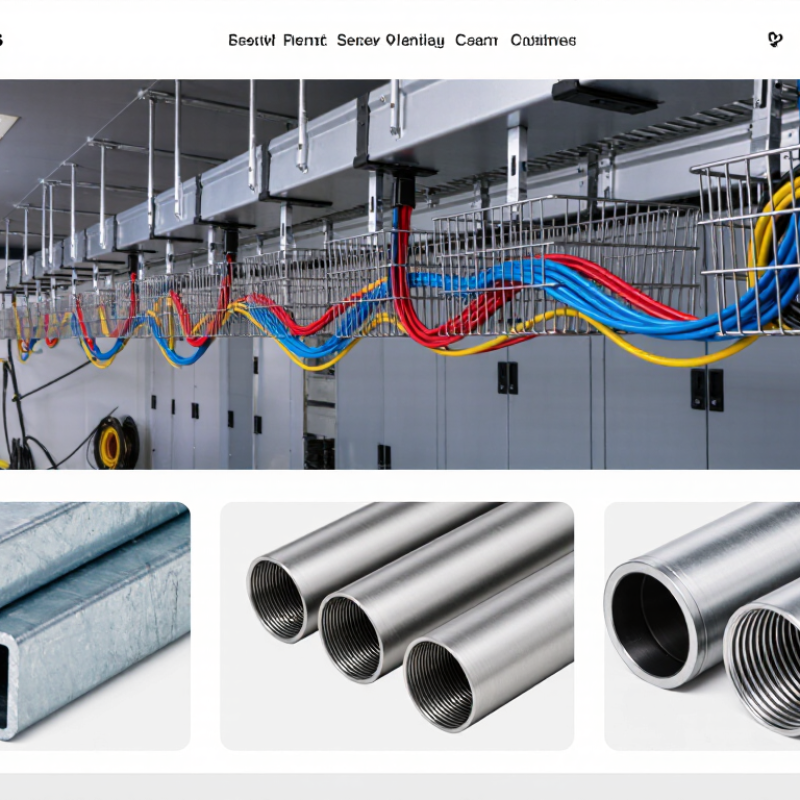
Cable basket types suit different installation environments. Welded-wire baskets provide open ventilation and allow quick visual checks. They work well for data cables, control wiring, and light power circuits. Ladder-style baskets support heavier cables and longer spans. Their wider rungs also make cable dressing easier during maintenance.
Perforated baskets offer more continuous support than wire designs. They can reduce cable sag, especially near equipment connections. Solid-bottom baskets protect sensitive cables from falling dust and small debris. However, they may retain heat if airflow is limited. I have seen installers choose a strong basket, then overlook bend radius and future capacity. That decision created crowded corners and difficult repairs.
Tips: Measure the planned cable load before selecting a width. Keep spare space for future circuits. Check the basket’s load rating, finish, and corrosion resistance. Use bends that protect the manufacturer’s minimum cable radius. For outdoor areas, choose materials suitable for moisture and temperature changes. Confirm support spacing with local electrical requirements and qualified professionals. A small test section can reveal installation problems early. Do not trust appearance alone. A neat basket may still lack proper support or grounding continuity.
How to Choose the Best Cable Basket for Your Needs
Compare the bottom construction of common cable support types to help match a system to your installation.
A value of 1 means the feature is present; 0 means it is absent. Wire mesh baskets and ladder trays have open-grid or rung-style bottoms that allow airflow and cable access. Perforated trays provide a sheet-style support surface with openings, while solid-bottom trays provide an unperforated surface. Exact designs vary by product; consider cable type, environment, access, and support requirements when choosing.
Assessing Cable Load, Size, and Routing Requirements
Choose a cable basket by measuring the actual cable bundle, not estimating from a drawing. Record cable diameters, total weight per metre, and planned spare capacity. NFPA 70 (2023), Section 392.22, sets cable-tray fill limits by cable size and configuration; its 40% figure applies only to specified arrangements, not every basket. Check the relevant table and local requirements. For load, compare the basket’s rated working load with the combined cable weight across each support span. IEC 61537 provides testing and performance requirements for cable tray systems, but ratings depend on the product and installation. A longer span can reduce capacity.
Routing matters just as much. Map turns, drops, crossings, and access points before installation. Check bend radii against cable specifications, especially for fibre and larger power cables. Leave room for additions and avoid tightly packed corners that make maintenance difficult. A tidy route on paper can still be awkward above a crowded ceiling; review it with installers before fixing supports.
Tips: Add up cable weight per metre, then check the basket rating at your actual support spacing. Allow practical spare space, but don’t treat a generic fill percentage as a substitute for the applicable standard or project requirements.
How to Choose the Best Cable Basket for Your Needs - Assessing Cable Load, Size, and Routing Requirements
Use these example ranges as an initial planning guide. Actual cable weight, basket capacity, and allowable support spacing depend on the selected product, installation conditions, and applicable electrical codes.
| Cable application |
Typical basket width × depth |
Example cable load |
Initial support-spacing range |
Routing and selection considerations |
| Data and communications |
50–100 mm × 50 mm |
About 2–5 kg/m |
1.5–2.0 m |
Allow room for cable additions and maintain the cable manufacturer’s minimum bend radius. Keep separation from power circuits where required by the installation rules. |
| Control and instrumentation |
100–200 mm × 50–100 mm |
About 5–10 kg/m |
1.5–2.0 m |
Consider screening and separation needs for sensitive signals. Use suitable dividers or separate routes when required by the system design. |
| Mixed small power and control cables |
200–300 mm × 50–100 mm |
About 8–15 kg/m |
1.2–1.8 m |
Check the combined cable weight and preserve access for installation and maintenance. Plan fittings for tees, risers, and changes in direction. |
| Multiple power cables |
300–450 mm × 100 mm |
About 15–30 kg/m |
1.0–1.5 m |
Use the actual cable schedule to calculate loading. Review thermal grouping, conductor arrangement, support locations, and the basket’s published load-versus-span rating. |
| Heavy or high-density power route |
450–600 mm × 100–150 mm |
About 30–40 kg/m or more |
Typically 1.0–1.2 m; confirm by calculation |
Obtain engineering confirmation of basket capacity, joints, supports, and fixing points. Consider a heavier-duty containment system if the calculated load exceeds the product rating. |
| Vertical riser or frequent direction changes |
Select width and depth from cable count and bend radius |
Calculate from the cable schedule |
Provide supports near fittings and as required by the design |
Check cable restraint, fitting compatibility, access, and the cable maker’s bend-radius limits. Account for additional forces at bends and vertical transitions. |
Sizing checklist: Sum the installed cable weights per metre, allow practical spare capacity, confirm basket dimensions and load ratings for the intended support span, and verify material finish for the environment. Do not treat example loads or spacing ranges as product ratings.
Evaluating Installation Methods, Safety, and Accessibility
A cable basket should match the route, cable load, and maintenance needs—not just the available space. Before choosing, check the support surface and how installers will reach each fixing point. Overhead runs may need lifts or extra clearance; wall-mounted baskets can be easier to inspect but may obstruct doors or walkways. Leave enough room for bends and future cables. A tight fit looks tidy, until a repair is needed.
Tips: Confirm the basket’s load rating, support spacing, and edge protection. Keep sharp cut ends away from cable jackets. Check that covers, if used, can be removed without disturbing nearby services.
After installation, look along the full route for sagging, loose joints, and pinch points. Keep power and data cables separated where the project specification requires it. Use suitable supports rather than relying on the basket to bridge long gaps. Make sure labels remain visible and cable bundles can be reached without dismantling other runs. One detail is easy to overlook: a basket that is safe today may become difficult to access after ceilings, pipes, or equipment are added. Review the route with the people who will maintain it.
Selecting the Right Cable Basket for Long-Term Performance
A cable basket should suit the conditions it will face for years, not just the installation day. Start with the environment. A dry office ceiling has different demands from a damp plant room or an outdoor route exposed to rain. Galvanized steel can suit many indoor settings, while stainless steel may be more appropriate where moisture or cleaning chemicals are present. Check the finish and material against actual exposure; “corrosion-resistant” does not mean corrosion-proof.
Small details matter. Estimate the combined weight of cables, including likely additions, and check the basket’s load rating and support spacing. A lightly loaded section can still sag if supports are too far apart. Avoid filling every opening tightly, since crowded cables can make heat management and later repairs harder. Inspect cut edges and connectors, too. A sharp edge can damage insulation during a pull, even when the basket itself is strong.
Plan the route around access and future changes. Broad turns are usually gentler on cables than tight corners, and removable covers can help where regular inspection is expected. A heavier basket may feel reassuring, but weight alone says little about long-term performance. Installation quality matters just as much. Check that joints are secure and supports remain firm during periodic inspections. Rust starts quietly. Look closely near cut points and damp areas, where early wear can be easy to miss.