Choosing Walk Path Lights in 2026 is about more than making a garden look inviting. The right fixtures help people see steps, edges, and changes in level without washing the yard in glare. A useful starting point is the U.S. Department of Energy’s guidance: LED lighting uses at least 75% less energy and can last up to 25 times longer than incandescent lighting. That comparison concerns LED technology generally, not every outdoor fixture, so check each product’s specifications.
Light placement matters just as much as efficiency. DarkSky’s Five Principles for Responsible Outdoor Lighting recommend using light only when needed, directing it carefully, keeping levels modest, and choosing warmer color temperatures. In practice, that might mean a shielded fixture aimed at a stone path rather than a bright lamp shining into a neighbor’s window. Look closely at brightness, beam direction, weather resistance, power source, and replacement parts. Solar models can simplify installation, but shade and short winter days may affect performance. Small details count.
There is no single best layout. A narrow path beside a low garden wall needs different lighting from broad steps beneath trees. Even a carefully spaced row can leave dark patches when plants grow or fixtures shift. That is easy to overlook. This guide explains how to compare designs, assess real-world limitations, and choose Walk Path Lights that fit your route, climate, and maintenance preferences.
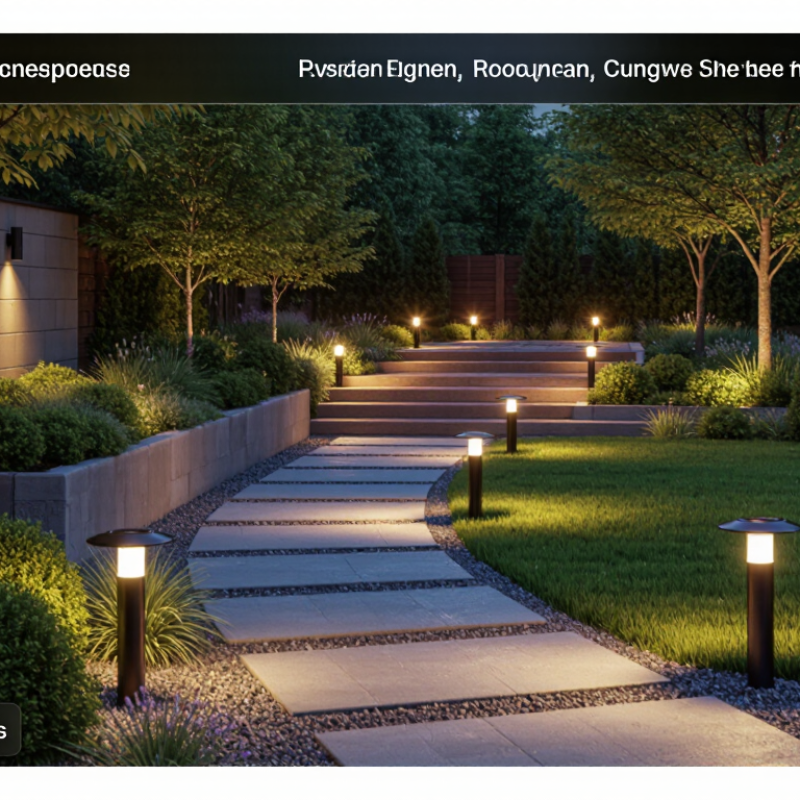
Walk path lights are low-level fixtures that mark the edges or direction of an outdoor route. Their purpose is to make steps, turns, and changes in surface easier to notice after dusk. They can also help people recognize a garden entrance without flooding the whole yard with light. Not just decoration. A useful layout gives enough visual cues to follow the path while keeping bright sources out of the eyes.
Placement matters as much as brightness. A light aimed across a paving stone can reveal uneven joints, while a fixture pointed toward approaching visitors may create glare. Test after dark. Walk the route from both directions and notice where shadows hide edges or where the light feels harsh. In practical use, plants grow, soil shifts, and seasonal leaves can block a beam, so check the path again as the landscape changes. There is no universal spacing rule: narrow curves, steps, and darker surfaces may need closer attention than a straight, open walkway. A perfectly even row can look tidy, but it may not show hazards where they actually occur.
| Selection Factor | Common Options or Range | What to Consider | Suitable Use |
|---|---|---|---|
| Main purpose | Path guidance, step visibility, or landscape accent | Prioritize clear visibility of the walking surface; decorative effects should not create glare or obscure changes in level. | Walkways, garden paths, entrances, and steps |
| Power source | Solar, battery, or wired low-voltage lighting | Solar units depend on available sunlight and weather. Wired systems need a suitable outdoor-rated transformer and correctly installed cable. | Solar: sunny areas; battery: locations without wiring; wired: regular or extended lighting needs |
| Light output | Compare stated lumens; many path lights are designed for localized, low-level illumination | Lumens measure total light output, not how evenly the path is lit. Beam direction, spacing, mounting height, and surroundings also matter. | Use modest, shielded output for wayfinding; choose brighter directed light where visibility needs are greater. |
| Color temperature | Warm white (about 2700–3000 K) to neutral white (about 3500–4000 K) | Lower Kelvin values look warmer; higher values look cooler. Keep nearby fixtures consistent for a coordinated appearance. | Warm white for a softer garden feel; neutral white where a cleaner-looking view is preferred |
| Weather protection | Check the fixture’s IP rating and outdoor-use instructions | An IP rating describes protection against dust and water under specified test conditions. Choose a rating appropriate to the actual exposure and installation location. | Exposed paths, damp areas, and locations subject to sprinklers or rain |
| Spacing and layout | Set spacing based on beam spread, brightness, mounting height, and path width | There is no universal spacing that suits every fixture. Test a short section at night and adjust to avoid dark gaps, excessive overlap, and glare. | Straight paths, curves, and wider walkways |
| Materials and finish | Metal, plastic, or composite housings; finishes vary by product | Check corrosion resistance, UV exposure guidance, lens durability, and replacement-part availability for the installation environment. | Coastal, sunny, wet, or high-traffic locations |
| Controls and maintenance | Manual switch, timer, photocell, or motion sensor (where available) | Check operating schedules, sensor coverage, battery replacement needs, and access for cleaning or servicing. | Homes seeking scheduled, dusk-to-dawn, or occasional activated lighting |
Note: Product performance varies with design, installation, weather, and site conditions. Follow the fixture manufacturer’s instructions and local electrical requirements.

How to Choose the Best Walk Path Lights in 2026?
Identifying Your Path’s Layout, Lighting Needs, and Conditions
Walk the path after dusk and note where its shape creates blind spots. Measure the width, mark bends, steps, and changes in surface, such as paving stones meeting gravel. Corners need attention. A narrow path may need fewer, softer fixtures than a broad walkway. Avoid placing lights where open doors, shrubs, or snow piles could block them.
Decide what needs to be visible: the path edge, a step, or the route to a gate. Even spacing can help, but a perfectly even row may feel harsh beside a quiet garden. Test after dusk. Check whether light reaches the ground without shining into eyes or nearby windows. Then consider shade, rain, irrigation spray, and seasonal growth. Solar fixtures may struggle beneath dense trees, while wired options need careful placement and suitable outdoor-rated equipment. Conditions change; inspect the route again after plants fill out.
Tips: Sketch the path and mark hazards before shopping. Test one fixture in the darkest section first. Notice what it misses, then adjust spacing or brightness. A small trial can reveal more than a neat plan on paper.
Choose walk-path lights by the job they need to do, not by appearance alone. Low bollard lights spread illumination across wider paths, while shielded downlights help reduce glare near steps. Recessed lights create a subtle edge marker, but they may be less visible in bright surroundings. A warm color temperature, around 2700–3000K, often feels comfortable outdoors. Too many bright fixtures can make a path harder to read, not easier.
Power source matters. Solar lights avoid buried wiring and suit sunny, open areas, but shade and short winter days can reduce runtime. Low-voltage wired lights deliver steadier output; they need a suitable transformer and carefully planned cable routes. Battery models are simple to place, though replacement or recharging becomes routine. No option is maintenance-free. Check the fixture’s outdoor rating and follow its installation instructions, especially around exposed connections.
Look for a stable base, corrosion-resistant materials, and LEDs with replaceable parts when available. A motion sensor can help at an entrance, but may feel distracting along a quiet garden path. Compare beam spread and spacing in the maker’s specifications rather than relying on a single lumen figure. On a narrow, curved walkway, a few softer pools of light may work better than evenly spaced bright spots. I would leave room to adjust; the first layout is rarely perfect.
Typical lumen ranges by fixture style. Actual output varies by product; use these ranges as a starting point, not a universal specification.
Choosing a power source: Solar lights avoid wiring but depend on sunlight and battery capacity. Low-voltage wired systems provide consistent power and require a transformer; line-voltage installations may require professional installation. Compare the fixture’s lumen rating, weather-resistance rating, beam direction, color temperature, and replaceable-battery options before buying.
How to Choose the Best Walk Path Lights in 2026?
Brightness should make edges and changes in level easy to see, not turn a garden path into a runway. Compare lumen output and beam spread, then check the route after sunset. A lamp can look bright on its box yet leave gaps between pools of light. A layout that seems balanced at noon may feel uneven at night. Test it in place.
Durability matters where rain, grit, and sprinklers reach the fixtures. Check the IP rating for resistance to water and dust, and look for sealed joints and corrosion-resistant materials. Stable stakes help prevent leaning in soft soil. Still, no rating replaces checking the cable, lens, and seals after a harsh season. Small details matter.
For safety, aim light downward and keep glare out of walkers’ eyes. Place fixtures near steps, bends, and uneven paving, rather than spacing them by habit alone. Energy use deserves equal attention. The U.S. Department of Energy’s Energy Saver guidance reports that LEDs use at least 75% less energy and last up to 25 times longer than incandescent lighting. Solar models can reduce wiring, but shade and short winter days may limit output. Check brightness on a cloudy evening, too.
Choosing walk path lights starts with the route itself. Notice dark bends, steps, and uneven paving after sunset. These spots need clearer light than a straight, open path. Low-glare fixtures help people see the ground without shining into nearby windows. For a soft, even effect, place lights along both sides, but avoid lining them up like runway markers. A few well-positioned lights often work better. Solar models are convenient where sunlight reaches them; wired lights offer steadier output in shaded areas. Check weather resistance and choose a warm color tone that feels comfortable outdoors.
Before installation, test the layout after dark with temporary lights. Move them around. It may feel a little fussy, but it can reveal awkward shadows before you dig. Keep fixtures clear of mower paths and wide enough from the walkway to avoid trips. For wired systems, follow the manufacturer’s instructions and check for buried utilities before digging. Set stakes firmly, but do not force them into hard or frozen soil. A crooked light is easy to overlook in daylight.
Maintenance is simple, though not entirely hands-off. Wipe lenses with a damp cloth, clear leaves from solar panels, and check that fixtures still point toward the walking surface. After heavy rain or frost, look for loose stakes, standing water, and damaged wires. Replace weak batteries when needed. Light output can fade gradually, so compare neighboring fixtures rather than relying on memory. I once assumed a dim light had failed; dirt was the problem.
Fill out the form below and our team will get back to you ASAP.
Snake Tray® is Green and Proudly Powered by the Sun! Snake Tray is committed to designing and manufacturing products that have many green benefits. Our products are made of recycled goods, minimize material waste, are energy efficient, use less non-renewable resources and nest together read more…
Snake Tray® 291 Skip Lane, Bay Shore NY 11706 | PHONE: 631-674-0004 | FAX: 631-674-0010 | www.bakoselectric.com | LEGAL | MADE IN USA
© 2025 SnakeTray. All rights reserved
Fill out the form below to download your document.