What Is a 90° Peel Strength Tester?
A 90° Peel Strength Tester measures the force required to separate a bonded material at a controlled right angle. It is widely used for pressure-sensitive tapes, labels, films, laminates, medical dressings, and flexible packaging. In practical testing, the operator fixes the sample, sets the peel rate, and records force through a calibrated load cell. The result is commonly reported as force per unit width, such as N/25 mm.
The need for reliable peel testing is growing with packaging innovation. Smithers’ packaging market analyses identify flexible packaging, lightweight structures, and recyclable materials as continuing industry priorities. These changes can reduce material thickness while increasing sensitivity to surface treatment, adhesive coating weight, and humidity. A small variation may create a visible failure. Sometimes, only a few millimeters reveal the problem.
Relevant methods include ASTM D6862, which describes 90-degree peel resistance for adhesive bonds, and ISO 8510-1, which addresses peel adhesion between flexible adherends. These standards help laboratories control specimen preparation, conditioning, peel speed, and data reporting. However, a standard does not remove every source of uncertainty. Results may still vary because of roller pressure, liner removal, edge alignment, or adhesive transfer.
This guide explains what a 90° Peel Strength Tester is, how its mechanism works, and why test conditions matter. It also considers fixture design, calibration, failure modes, and practical interpretation. A smooth graph is not always proof of a strong bond. Experienced technicians inspect the peeled surfaces, observe stretching or residue, and question unexpected values before approving a material. That caution supports more dependable quality decisions.
Definition and Purpose of a 90° Peel Strength Tester
What Is a 90° Peel Strength Tester?
A 90° peel strength tester measures the force required to separate a flexible material from a bonded surface at a right angle. It commonly evaluates adhesive tapes, labels, films, protective layers, and laminated materials. The test shows how firmly an adhesive holds during controlled removal.
During testing, one material is fixed to a rigid panel. A prepared strip is pulled upward at 90 degrees while a calibrated load cell records the peeling force. The machine maintains a steady peel speed, reducing changes caused by hand movement. Testers usually report results as force per unit width, such as N/25 mm. Sample conditioning, bonding pressure, dwell time, and surface cleanliness can strongly affect the result.
Small details matter. A technician should check alignment before each run. Even a slight angle change may influence the measured force. The panel surface must also remain clean and consistent. Results are useful for comparing adhesive formulations, checking production consistency, and selecting materials for practical applications. However, the test is not flawless. Real products may face heat, moisture, vibration, or uneven surfaces that a laboratory test cannot fully reproduce. This limitation deserves attention. Reliable decisions come from repeated tests, documented conditions, and calibrated equipment rather than one attractive number.
What Is a 90° Peel Strength Tester?
A 90° peel strength tester measures the force required to separate a flexible material from a bonded surface while maintaining a peeling angle of 90 degrees. The result is commonly reported as force per unit width, such as N/25 mm or N/100 mm.
The chart compares the two widely used peel geometries: 90° and 180°. In a 90° test, the peeled material is pulled perpendicular to the bonded surface, helping evaluate adhesive bonding performance under a controlled right-angle loading condition. Test results depend on material type, specimen width, peel rate, temperature, humidity, and surface preparation.
Reference geometry: 90° peel testing is described by methods such as ASTM D6862 and ISO 8510-1. Actual test conditions should follow the applicable standard for the material and application.
Key Components and How the Tester Works
A 90° peel strength tester measures the force required to separate a flexible material from a bonded surface at a right angle. It is commonly used for tapes, labels, films, protective layers, and adhesive laminates. The result is usually reported as force per unit width, such as N/25 mm. This value helps engineers compare bonding performance under controlled conditions.
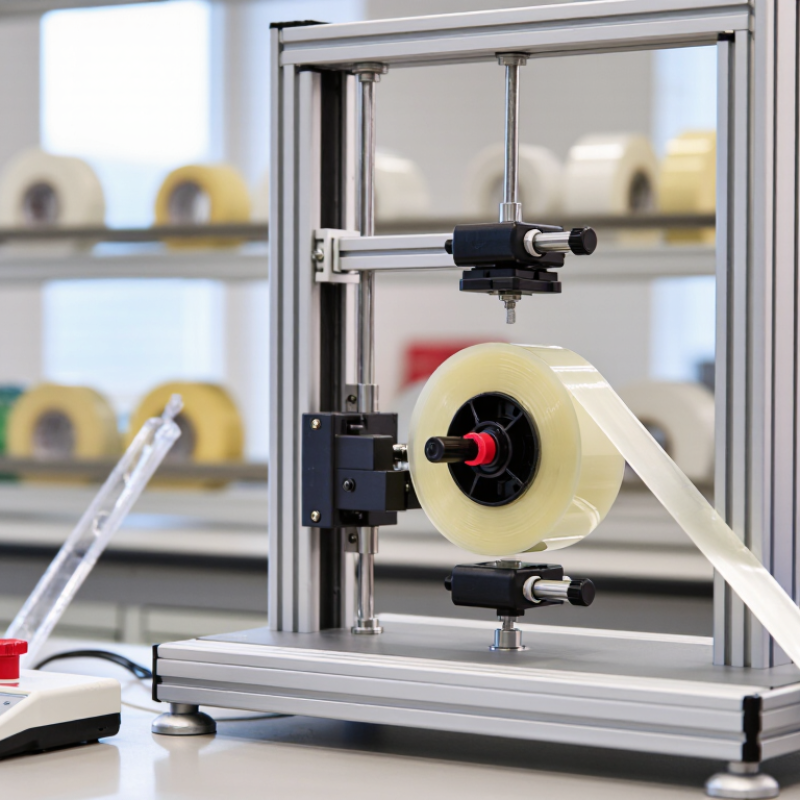
The tester has several important components. A motorized carriage moves at a fixed speed, while a load cell records the peeling force. The specimen is held by a clamp, and the bonded panel rests on a stable platform. A guide or roller keeps the peel path close to 90 degrees. Even a small angle change can affect the reading. The control system stores force data and may display average, minimum, and maximum values.
Testing begins by applying the sample to a clean panel with controlled pressure. The operator then lifts the free end and secures it in the clamp. As the carriage moves, the load cell measures resistance across the peel line. In practical work, surface cleaning and dwell time deserve careful attention. Dust, uneven pressure, or a crooked sample can create misleading results. One detail is easy to overlook: the adhesive may stretch before releasing. That behavior can produce unstable peaks. Calibration should be checked regularly, although routine checks are sometimes skipped when production is busy. A thoughtful report records the substrate, sample width, peel speed, temperature, and conditioning time.
Test Specimens, Materials, and Preparation Requirements
A 90° peel strength tester measures the force needed to separate a flexible layer from a bonded surface at a right angle. The result is commonly reported as force per unit width. It helps evaluate tapes, labels, films, laminates, and coated materials. Test accuracy depends heavily on specimen preparation, not only on the instrument.
Cut specimens with clean, parallel edges and a consistent width. Remove dust, oil, and loose particles without changing the surface. Apply the adhesive layer evenly, then use controlled pressure to create contact. Record the dwell time, temperature, humidity, backing thickness, and substrate type. These details affect adhesion significantly. Real samples are rarely perfect. Slight wrinkles or uneven coating can distort the peeling curve, so defective pieces should be identified rather than quietly discarded.
Tips: Keep the peel angle at 90° throughout the test. Align the specimen with the machine’s centerline. Avoid touching the bonding area with bare fingers. Condition samples in a controlled environment before testing. Use enough replicates to reveal variation, not just a convenient average. I would also photograph unusual failure modes, such as adhesive residue on the substrate or tearing within the backing. That evidence often explains a surprising result better than a single numerical value. When results seem inconsistent, check preparation records before blaming the tester.
Step-by-Step Procedure for Measuring Peel Strength
What Is a 90° Peel Strength Tester?
Step-by-Step Procedure for Measuring Peel Strength
A 90° peel strength tester measures the force needed to separate a flexible material from a bonded surface. The sample is peeled at a controlled right angle. This setup reflects practical conditions, such as lifting a label or separating a film. Test results usually appear as force per unit width. Accurate results depend on sample preparation, alignment, speed, and conditioning.
Cut several specimens to the specified width and length. Condition them under the required temperature and humidity. Clean the test fixture, then place the bonded sample on the support platform. Attach the free end to the upper grip. Keep the peel line at 90 degrees throughout the test. Set the pulling speed according to the selected test method. Start the machine and record the average force, peak force, and failure mode. Repeat the test on multiple specimens. One result is not enough. Small wrinkles or uneven edges can affect the reading more than expected.
Tips: Check the grip alignment before every test. Leave enough material for secure clamping. Avoid touching the adhesive area with bare fingers. Watch for slippage during peeling. If the force curve looks irregular, inspect the specimen before accepting the data. Real tests are rarely perfect. Document unusual breaks, residue, temperature changes, and operator observations. These details often explain results that numbers alone cannot.